Showing posts with label binding. Show all posts

October 22, 2011

Class is in Session

I've started teaching some basic bookbinding at Sarbe Invitations and Paper on the Gold Coast.
At the moment it's pamphlet stitch and a little ledger binding, focusing on the basics of binding, paper grain, materials and techniques as well as decorating and experimenting with design.


Some of the finished products:


I'm highly enjoying the classes, even though I still get seriously nervous before each session!
Later in the year I'll be teaching a slightly more advanced binding, on tapes, as some people have expressed a desire to create something as a gift or journal for the new year.


Heheh, never thought when I started teaching myself about 2 and a half years ago, that I'd eventually be teaching others. XD


Approved!


*

October 3, 2011

A Long September

September hasn't been a very good month for me, it's thrown all sorts of nasties my way; family leaving, work problems, money problems, creativity problems.
Actually, this year has been more trouble than it's worth and though there have been some bright spots, they're very hard to focus on over the rest of the shit.
But September is finally over and one can only hope for the best from here.
I'll begin October with a few things I've been working on (or trying to!).

Arts.
I've actually got quite a few things to show since my last update, unfortunately, I'm currently at my parents house and the only images I have to show are some digital sketches and scans from the Art House Co-ops sketchbook project, which just happened to be the only things on my laptop XD


This is Zien. Heheh, haven't drawn one of my characters in a while...

Bookbinding.
These are the most recent bindings I've managed. It's been a little slower than i'd like but I like to hope I've improved, at least. 
(sorry about the photos for these, they were taken with my phone camera at my parents house -__-)
Case Bindings:

Exposed Spine Binding:
Binding with exposed spine on kimono fabric tapes, waxed linen thread, Japanese papers and bead embellishment.
I rarely make exposed spine books any more, I find the construction, though pretty and flat-opening, a little less resilient, flimsier, if you will, than casebound. It's probably not as bad as I make it sound, but I like the sturdy feel and structure of a completely cased in book. Still, these kinds of bindings have their place, and though it takes me a lot longer to make than a casebound, it's still a satisfactory feeling when it's done and always a striking result.

The paper I used for the bookblock for this particular book is called Como; a gorgeous, creamy, heavyweight, wet-media paper. It takes watercolour washes, inks, markers and all sorts of dry media. It has a light grain and is thick enough that each signature is a single leaf. Love.

Ledger Binding:
I'm going to be teaching a bookbinding class tomorrow starting with simple pamphlet bindings and ledger bindings like the one below. Hopefully, if there's enough interest, the classes will grow and I'll start teaching a few of the more advanced bindings that I know.
I'm actually pretty nervous, I've never taught adult classes before and being a self taught binder, I just hope people don't blast me for my methods which may not all be 'official'! XD


I'll really try to keep this updated more often, I've been doing a fair bit of experimentation with natural media lately; printmaking in particular, which I'm eager to show.
Thanks for sticking with me!

*

March 28, 2011

Bunch o Books

Just to show that I haven't been completely idle on the bookbinding side of things...

I've recently started a new job and its been a bit hectic on the adjustment side of things.
So far, I'm loving it, but I'm keeping my hopes on the down low until after my 3months probationary period... I hope they keep me! XD
I'll post some photos of my workplace later :3
Thanks for sticking around!


*

February 8, 2010

Grungy Notepad Tutorial and Printout

Day 21 of my 365 Design a Day, I created this little vectored printout project: To make your own grungy little notepad!
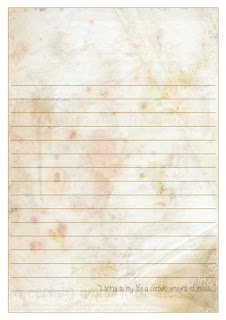

Get the download here: Notepad Pages PDF

The design was created in illustrator (so still vectors!) using a few grunge and dirt brushes and a texture background as well as various layer blending effects.

Free to download and print out for personal use only. :)


Mini Instructions:
1. Click on the link, download the PDF file to your computer, open it, print it out onto A4 or Letter size paper (may need a little resizing) of a decent weight/thickness and not too opaque; I used an 80GSM weight, smooth paper. Regular printer paper works fine.
2. Print out more than one page, say, between 10 and 20 (5 or 10 double pages), depending on the weight of the paper (lighter/thinner paper = more pages can be bound together, thicker/heavier paper = fewer can be bound together as it becomes much more difficult to either punch holes or staple).
2. Trim if you prefer not to have the white borders showing.
3. "Bind" the pages together at the top section using a hole punch and strong thread/ribbon or staples.
4. Cover the binding with sticker paper or fabric of choice.
5. Enjoy your new notepad! :D


Photo Tutorial:
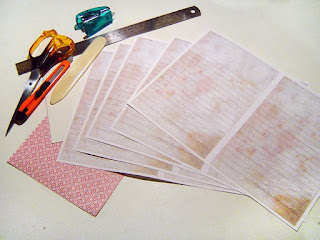

Gather your materials, here I have my printouts (I printed 9 pages so that's 18 sheets in my notepad, for more printing info, check the mini instructions above), a piece of recycled cardboard for the backing, sticky backed patterned paper for the upper wrap and tools of choice.
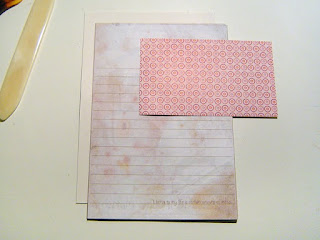
Trim your printouts to your desired size, here I've cut all the white out but you can leave it in if you like a border around each sheet.
Cut your backing card to the same size as your printouts.
Cut your sticker paper or fabric etc to the same width as the printouts and between 8 and 10cm high. You can easily measure how much you want to use, however, by putting the paper against the top margin of the printouts and roughly measuring and marking how far down you'd like the paper to go. Just remember to leave enough to wrap over the block of printouts and down the the back a little.
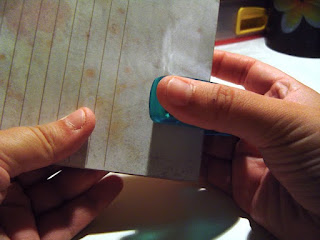
Gather your printed sheets and backing card together and jog them a bit to get them as aligned as possible.
Staple about halfway down the top margin on the printouts - Make sure your stapler is strong enough to staple cleanly through all your papers and card.
Another method here is to punch two holes halfway down the top margin and tie a ribbon or heavy thread through the gathered sheets. The next step is optional if you chose the hole punching method as your ribbon may make too much bulk for the covering sticker paper/fabric.
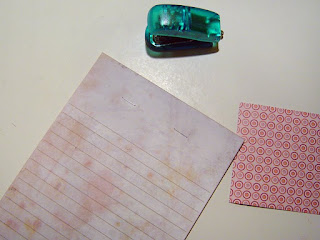
Stapled block of sheets and card backing!
Covering sticker paper ready to be attached.
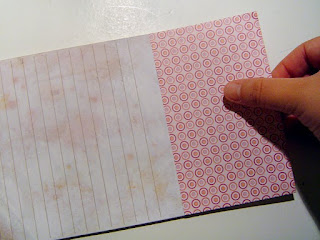
Remove the backing paper from the sticker paper and carefully align it with the sides of the bookblock (your block of printed sheets and card), a little over halfway down and covering the staples, just make sure you have enough of the sticker paper to wrap around the top and attach to the card at the back, as in the next photo.
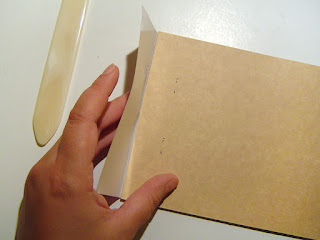
Turn your block over and using a bone folder to help with the crease, pull the sticker paper over the top of the block and down to stick to the card backing.
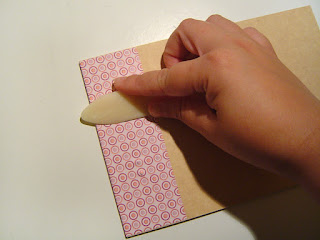
Use a bonefolder or equivalent to apply pressure, carefully! or you might tear the paper where the staples are.
Smooth out creases and press the sticker paper firmly to the front and back of the block of sheets.
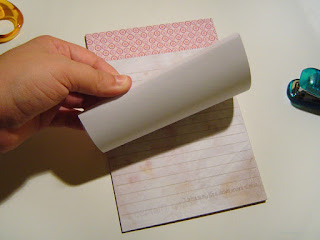
Enjoy your new notepad!
An easy little project under 30 minutes. :D


Cross posted to my 365 Days of Vee Blog also.

*

Other Relevant Links

LinkWithin Related Stories Widget for Blogs